Automatically apply Blunt Start / Quick Start threads. For removal of incomplete threads on the part.
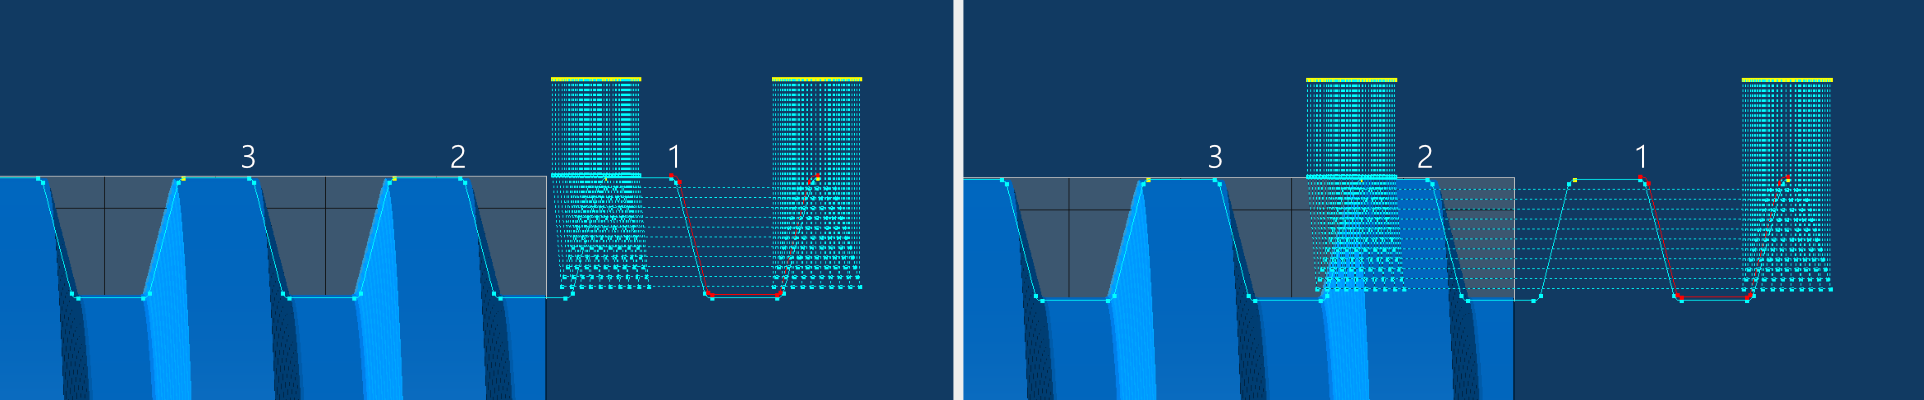
Removal of incomplete thread at the end of a thread
Removal of incomplete thread at both ends of a thread
Removal of incomplete thread at the front of a thread
Enable Blunt Start : This will enable Blunt Start threads to be calculated when pressing the Do It button. All machining will be done with the same tool as the main thread ( as defined in Tooling tab ).
It can be a good practice to set up the main thread first and generate the operations for roughing and finishing,
then turn off Do Roughing and Do Finishing and apply the operations for blunting seperately.
Remember to turn on Process Ops to generate GibbsCAM operations for blunt start. Turn Process Ops off while setting everything up.
For Blunt starts in multiple positions on the thread, GibbsCAM operations for one position must be generated at a time.
Set the amount of revolutions of thread to remove. This is calculated from Thread Start Z in Machining tab (Tab 4)
Depending of how far the Thread Start Z are set from the material, set any number here until it reaches over the incomplete thread.
Use number with decimal to adjust in between revolutions e.g. 1.5 or 2.2
Spindle RPM : Set to use 100% or 50% RPM for when machining blunting passes.
100% will use the same RPM as the roughing passes, 50% will use half the RPM as the roughing passes.
If the machine can handle changing RPM and be synchronized, a lower RPM can help the machine to perform these short and fast moving threading toolpaths.
DIfferent machine vendors have this as a seperate option to change RPM during threading and keep the thread synchronized. If your machine are not equipped with this, use Spindle RPM at 100%
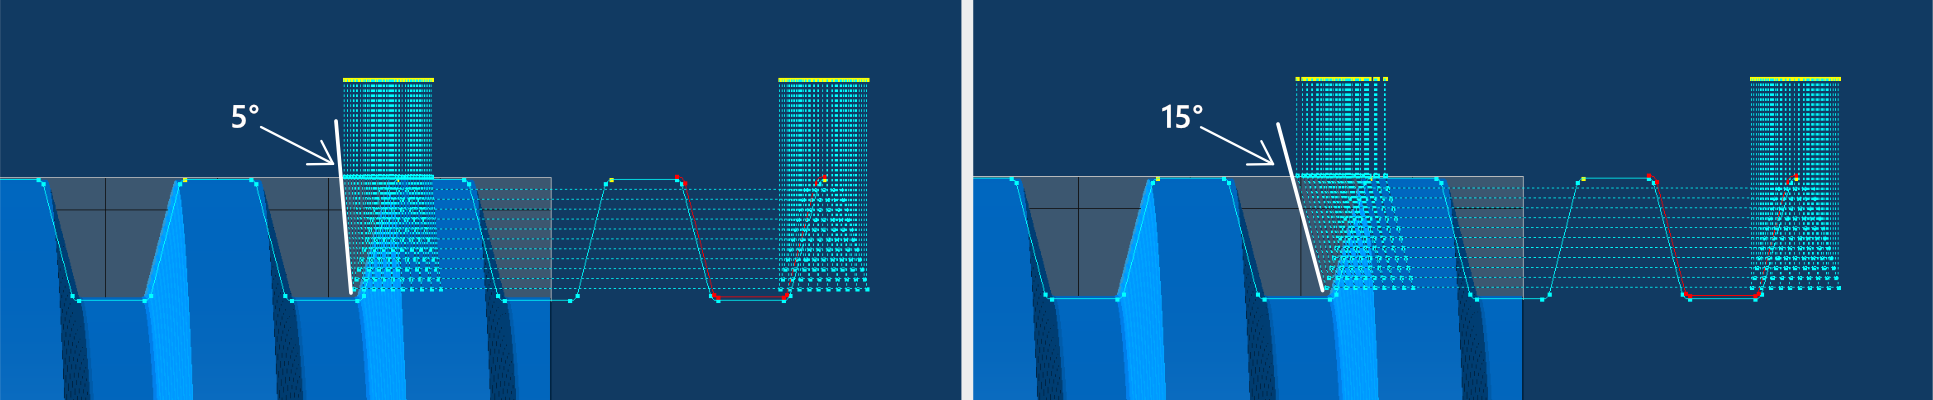
Set an run-out angle for the tool to exit the material. 0 is straight up and will produce the shortest blunt.
Larger angle will make the tool to use longer time to move out of the material so the distance of the blunted thread will be longer.
Run-Out Angle are not necessary for when exiting into a thread relief or air, as when making a blunted thread at the end of the thread.
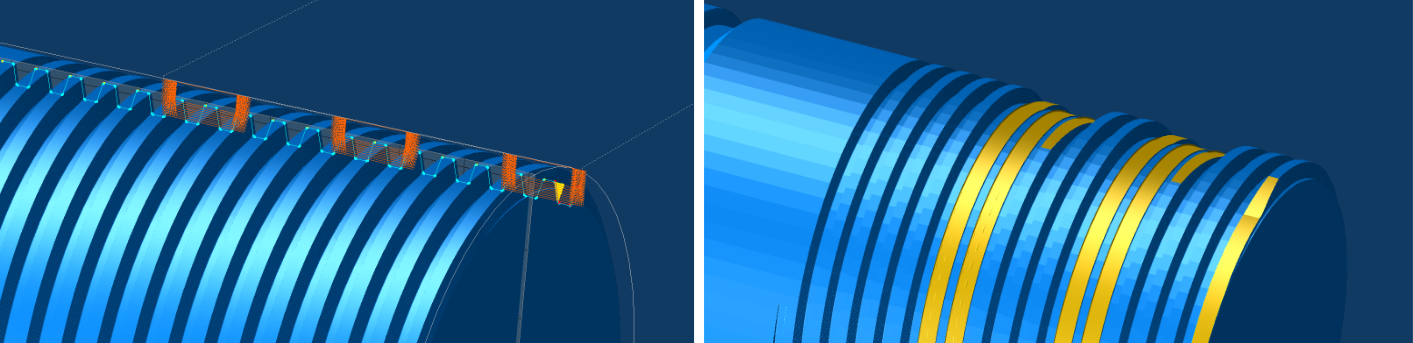
Run-Out Angle : 5° Run-Out Angle : 15°
Simulation with Blunt/Quickstart at the start of the thread, 5° and 15° Run-Out Angle
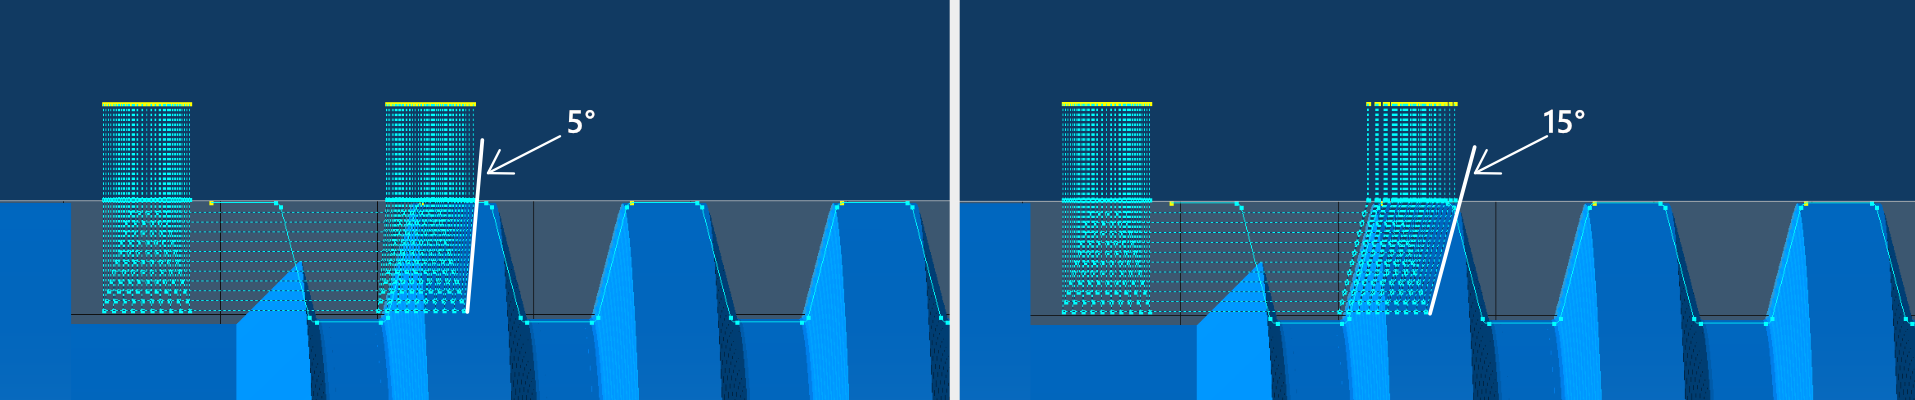
Set an run-in angle for the tool when entering material. 0 is straight down and should only be used if starting in air.
Larger angle will make the tool to use longer time to reach the cut depth so the distance of the blunted thread will be longer.
Run-In Angle are not necessary for entry into air, as when making a blunted thread at the start of the thread.
Run-In Angle : 5° Run-In Angle : 15°
Simulation with Blunt/Quickstart at the end of the thread, 5° and 15° Run-In Angle
Height to remove : Set the percentage of thread height to remove. 100% will remove the thread down to the root. 90% will leave a tiny amount and often results in a better finish.
Select from the dropdown menu what percentage of thread height to remove. 50%, 60%, 70%, 80%, 90%, 95% and 100% are available.
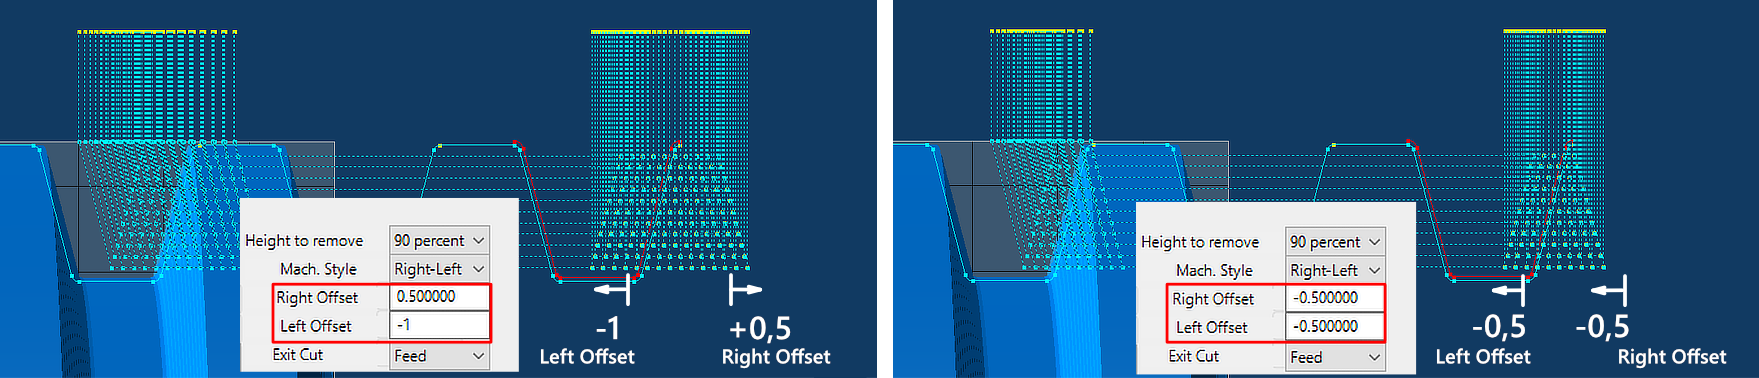
Right Offset and Left Offset can be used to offset the blunt position in the Z axis. Use positive and negative numbers for both directions.
Right Offset : This will offset the blunting positions on the right side of the thread profile. Left Offset : This will offset the blunting positions on the left side of the thread profile.
The default Right and Left offsets of 0 are the calculated minimum width and position the current tool need to remove the thread down to the root.
Various machine tool states with different parameters, ballscrew backlash, acceleration settings, etc can make different machines leave different results when blunting threads.
When running these blunt passes for the first time, always try to run with conservative depth of cuts and observe the machining process.
If the tool leaves a sliver of thread after the process, you can adjust and center the blunt toolpath with Right and Left offsets.
Widen the cutting area with adjusting Right and Left offsets in opposite directions (± Z axis).
Move the cutting area with adjusting Right and Left offsets in the same directions (± Z axis).
When setting up this can be useful to turn on Draw Toolpath Lines under Control tab to visualize the toolpaths before creating GibbsCAM operations (See image below).
Blunt Offsets
Blunt Offsets
With moving the blunt positions towards the end of the thread, you can machine away the sharp portion at the end of the thread.
Move the blunt position by counting the number of threads / revolutions and multiply this with the pitch of the thread.
Lets say for 15 threads / revolutions on a 4 TPI thread, set both Right Offset and Left Offset to -15*6.35 (-95.25mm) or if you work in inches, -15*0.25 (-3.75in)
You can enter mathematical operations directly in all the input boxes, e.g. type -15*6.35 and hit Tab key on keyboard.
Move positions anywhere on the thread, offset the position with multiplying revolutions with the pitch of the thread, and amount of revolutions to remove.
Removing portions of a thread in multiple positions
Always remember to use Run-in angle when moving blunting into the thread. Without Run-in all the blunt cuts will rapid unsynchronized into the thread.
Exit Cut : Set feed exit or rapid exit for when exiting out of the thread. Setting this to rapid will use G0 for exiting out of the thread.
Feed Exit will move the tool out of material with the same feed as when threading and follow the set Run-Out angle. Run-Out angle will determine the length of the blunted thread.
Rapid exit will move the tool out of material with rapid feedrate and will produce a short and steep blunted thread.
With Full Profile Exit option enabled, it will extend the end position past Thread End Z to follow the thread profile out of material.
With using Full Profile Exit, the exit of the thread will look similar to as if the thread was machined with a tool with the same profile as the thread.
This can also be used if the thread have no relief groove, and will produce a smoother end transition to the thread.